
How to Set Up Your Church Email in Common Email Apps
In order to configure your email box IMAP/SMTP, you can use the following configurations
Basic Email Settings
Before we begin, ensure you have the following information:
-
Email address: yourname@scenichills.org
- Password: (provided by administrator)
Incoming Mail Server (IMAP):
Server: imap.titan.email
Port: 993
Encryption: SSL/TLS
Outgoing Mail Server (IMAP):
Server: smtp.titan.email
Port: 993
Encryption: SSL/TLS
Nonetheless if you are looking to configure your email box using POP/SMTP, you can use the following configurations:
Incoming Mail Server (SMPT):
Incoming Server: pop.titan.email
Port: 995
Encryption: SSL/TLS
Outgoing Mail Server (IMAP):
Incoming Server: smtp.titan.email
Port: 465
Encryption: SSL/TLS
Add Email to Microsoft Outlook (Windows & Mac)
💻 Windows
- Open Outlook and navigate to File > Add Account.
- Enter your email address and click Connect.
- Select IMAP as the account type.
- Enter the following:
- Incoming Mail Server:
imap.titan.email, Port:993, Encryption: SSL/TLS - Outgoing Mail Server:
smtp.titan.email, Port:465, Encryption: SSL/TLS
- Incoming Mail Server:
- Enter your email password when prompted and click Connect.
- Click Next, then Finish to complete the setup. That’s it! Outlook will now sync your email.
You may also watch the video below, which shall help you step by step to set up your Titan Email account on Outlook.
🍏 MacOS
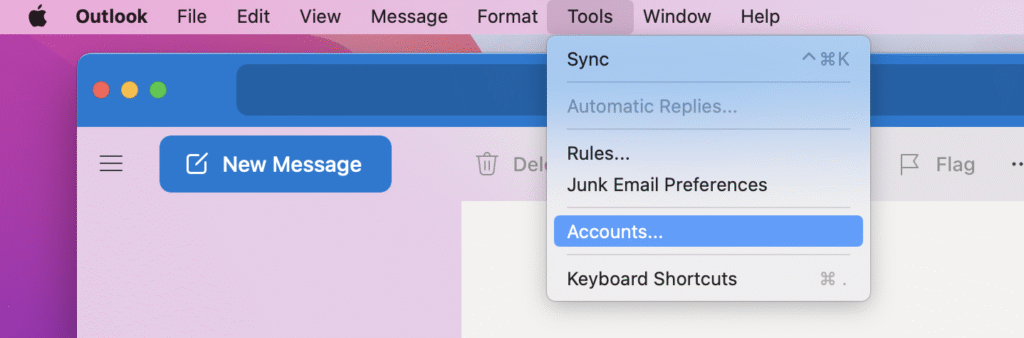
- Open Outlook and go to Tools > Accounts.
- Click the + sign and select New Account.
- Enter your email address and click Continue. Enter your Email address, IMAP Username, IMAP Password, and then enable the option for Advanced settings.
- Enter the IMAP details as imap.titan.email along with the port as 993.
- Enter the SMTP details as smtp.titan.email along with the port as 465.
- Please note that the username for IMAP is your Email address.
- Please note that the username for SMTP is also your registered Email address.
- Ensure the IMAP and SMTP password is the same as your email password.
- Also, please ensure you “enable Use SSL to connect.”

- Click Add Account and then click on Done on the pop-up that appears.
That’s it! Your account is set up on Outlook now.
📱 iOS
- Open the Outlook iOS application and ‘Enter your church Email Address’ and Tap on ‘Add Account‘.
- Click on ‘Not Exchange‘ at the top right corner of your screen.
- Select ‘Change account provider‘ from the options displayed.
- Proceed further by tapping on ‘IMAP‘ as shown below.
- Enter your ‘Email address‘, ‘Password‘, ‘Display Name‘ and ‘Description‘, then enable the option for ‘Advanced settings‘.
- Make sure that you enter the following data in the respective fields:
-
- Enter the IMAP details as imap.titan.email along with the port as 993.
- Enter the SMTP details as smtp.titan.email along with the port as 465.
- Please note that the username for IMAP is your Mail address
- Please note that the username for SMTP is also your Mail address
- Also, make sure that the IMAP and SMTP password is as same as your Mail password.
- Once you have entered the following details, click on ‘Sign in.
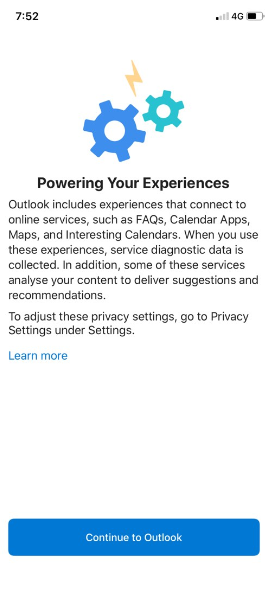
- Then click on -> ‘Next’ -> ‘Accept’ ->’Continue to Outlook’ in the popups that appear respectively.
- You shall be provided an option to either ‘Add another account’ or ‘Skip’, Choose ‘Skip’.
That’s it! Your Mail account will be successfully set up on Outlook.
🤖 Android
- Open the Outlook Android application and tap on ‘Add Account‘. Now enter your church email address and tap on continue.
- Proceed further by tapping on ‘IMAP‘ as shown in the GIF below.
- Enter your ‘Email address‘, ‘Password‘, ‘Display Name‘ and ‘Description‘, then enable the option for ‘Advanced settings‘.
- Make sure that you enter the following data in the respective fields:
- Enter the IMAP details as imap.titan.email along with the port as 993.
- Enter the SMTP details as smtp.titan.email along with the port as 465.
- Please note that the username for IMAP is your Mail address.
- Please note that the username for SMTP is also your Mail address.
- Also, make sure that the IMAP and SMTP password is the same as your Mail password.
- Once you have entered the following details, click on the tick mark at the top right corner.

- You shall be provided an option to either ‘Add another account‘ or ‘Skip‘ using the ‘Maybe Later‘ option.
That’s it! Your Mail account will be successfully set up on Outlook.
📧 Outlook 2024
- Open the Outlook App application and enter your church email address.
- Next, click on the Advanced Setup option
- From the list of providers, select IMAP option.
- Enter the password for your email address and select the Show more option.
- Enter the following details in the respective fields:
-
- IMAP incoming server: imap.titan.email
- SMTP username: Enter your email address.
- SMTP password : Enter the password for your church email address.
- SMTP outgoing server: smtp.titan.email
- Then, click Continue, and proceed.
 That’s it! Your Mail account will be successfully set up on Outlook.
Add Email to Apple Mail (iPhone, iPad, Mac)
iPhone, iPad
- Go to Settings > Mail > Accounts > Add Account.
- Choose Other, then tap Add Mail Account.
- Fill in:
- Name: Your name
- Email: yourname@scenichills.org
- Password: your email password
- Description: Church Email (your preferred name)
- Tap Next to continue.
- Select IMAP and enter:
- Incoming Mail Server:
imap.titan.email- Username: yourname@scenichills.org
- Password: your email password
- Outgoing Mail Server:
smtp.titan.email- Username: yourname@scenichills.org
- Password: your email password
- Incoming Mail Server:
- Tap Next and finish. Save the account.
- Disable syncing of Notes, if this is enabled. Tap Save
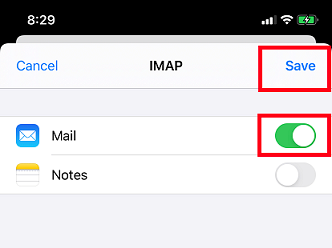 Your Mail account is all set!
MacOS/Apple Mail App
- Open Mail and “Add account” from the main menu
- Select Add Other Mail Account and click Continue
- Enter your Login credentials and click create/continue/Sign in
-
- Your Full Name, or as you would like it to appear on your sent email
- Enter your Email Address
- Enter your email account’s password
Click the Sign In button
- Enter server settings like incoming and outgoing server:
IMAP Configuration
Email address : Your Mail address eg: yourname@scenichills.org
Password : Your Mail password
Incoming Server : imap.titan.email
Encryption: SSL/TLS (Port: 993)
Outgoing Server : smtp.titan.email
Encryption: SSL/TLS (Port: 465)
POP Configuration
Email address : Your Mail address eg: yourname@scenichills.org
Password : Your Mail password
Incoming Server : pop.titan.email
Encryption: SSL/TLS (Port: 995)
Outgoing Server : smtp.titan.email
Encryption: SSL/TLS (Port: 465)
When email account is configured using POP server, the emails are fetched from the server into the third party client. Hence, the emails will be only visible on the third party client and not the Titan webmail or Titan App
And voila you are done!
However, you might come across an issue like this where it shows your connectivity status as
“Offline”
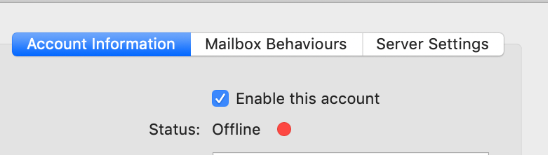
How to overcome this issue?
-
- Close Mail if it’s open now
- Click the Apple menu (upper left corner of your screen) > System Preferences > Internet Accounts
- Select the account with the broken outgoing mail server, and then click the minus sign at the bottom
- Reboot your Mac
- Click the Apple menu > System Preferences > Internet Accounts
- Re-add the Titan account
How to Set Up Titan Email on Android (Gmail App)
Gmail App (recommended)
- Go to Settings > Accounts
- Select Add Account
- Select the email client
- To configure Mail, tap on Other mail
- Enter your account and server details:
- Email – the email address you wish to set up. (Eg: yourname@scenichills.org
- Password– Enter the respective password
Incoming server (IMAP) settings:
-
- Hostname:
imap.titan.email - Port:
993 - Security: SSL
- Hostname:
Outgoing server (SMTP) settings:
-
- Hostname:
smtp.titan.email - Port:
465 - Security: SSL ( or Security: STARTTLS and Port:
587)
- Hostname:
- Click on Login
You will now be able to access your inbox!
That’s it! Your Titan Mail account is set up.
Add Email to Gmail (via Gmail app or Web)
Configuration Settings:
Username is same as email address
POP Server: pop.titan.email
Port: 995
Username is same as email address
SMTP Server: smtp.titan.email
Port: 465
- Log in to your Gmail account.
- Click the Gear ⚙️ Icon and select Settings > See all settings.
- Navigate to the Accounts and Import tab.
- Under Check mail from other accounts, click Add a mail account.
- Under Check mail from other accounts, click Add a mail account.
- Choose Import emails from my other account (POP3) and click Next.Use these settings:
- Username: your email address
- Password: your email password
- POP server:
pop.titan.email, Port:995 - Check Always use a secure connection (SSL)

- You will see a message stating “Your mail account has been added“.
- To continue to set up SMTP in Gmail, select Yes and click Next Step.
- Enter your Name, as you would like it to appear when sending emails from this account. Make sure the checkbox for Treat as an alias is checked.
- Gmail will prompt you to set up SMTP. Use:
- SMTP server:
smtp.titan.email, Port:465 - Username: your full email address
- Password: your email password
- Encryption: SSL.
- SMTP server:
- Click Add Account.
- Confirm with the verification code sent to your Titan email.
Congratulations! You have now configured your Titan Mail on Gmail!
You can now check your emails using Gmail’s inbox interface.
You may also watch the below video that shall help you step by step to setup your Email account on Gmail.